


Roger Chen
The seam carving algorithm assigns an energy to each pixel of the image. I used the sum of the gradients (of the value in HSV) in the left-right and up-down directions as my energy function. A dynamic programming algorithm finds the seam with the least cost. Then, I remove that seam by shifting the pixels to the right of the seam. This process is repeated some number of times.
Horizontal carving was accomplished by transposing the image before passing it to the algorithm, then transposing the result.
This was an easy example, because the shallow depth of field creates a background that is smooth. The blurred background produces very low values of the energy function.
This was also a good input image, because the overexposed window also produces very low values of the energy function.


In this case, both horizontal seam carving and vertical seam carving are possible well.


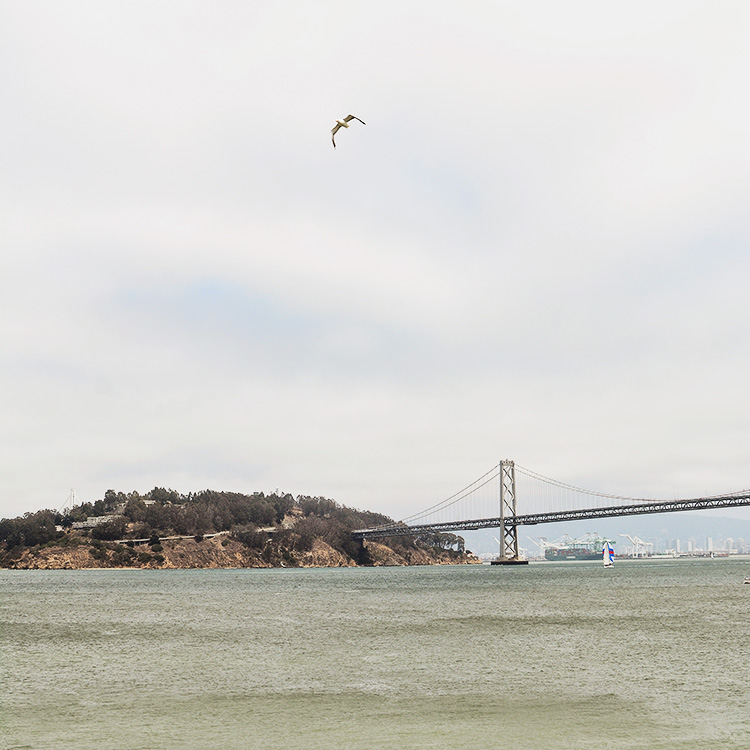
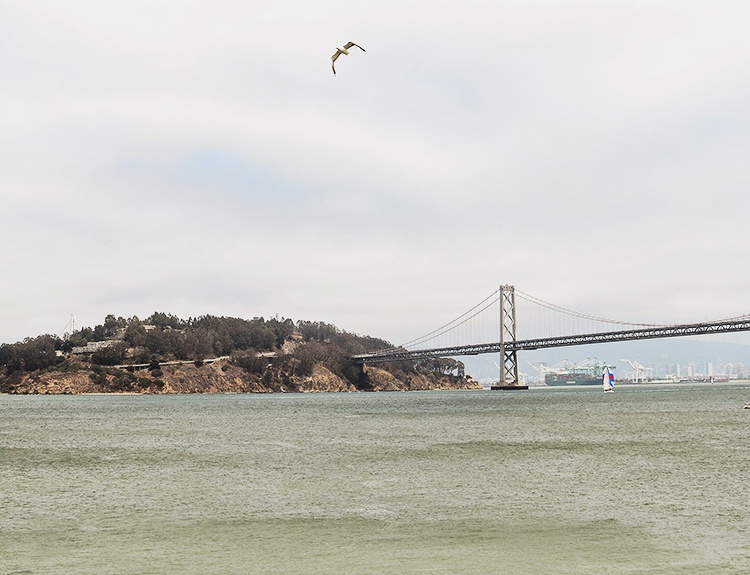
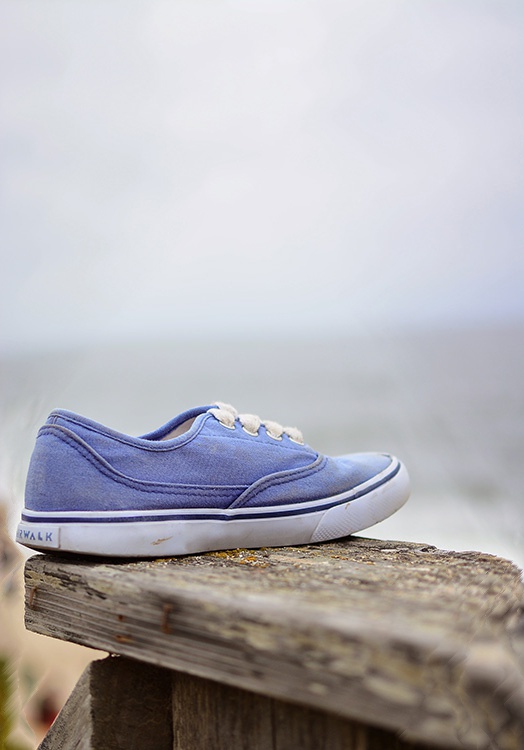
The sky in this image is a good target for seam carving. The ocean is also a single color, but it has a lot of internal texture, so it was not changed much under seam carving.

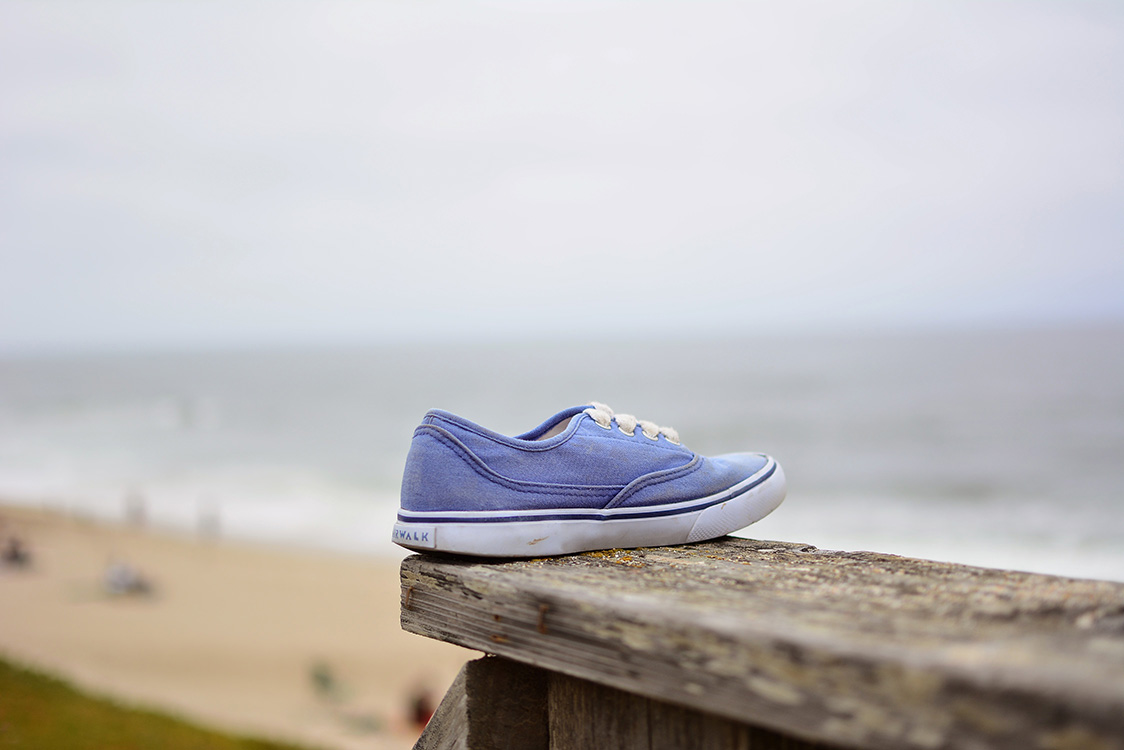
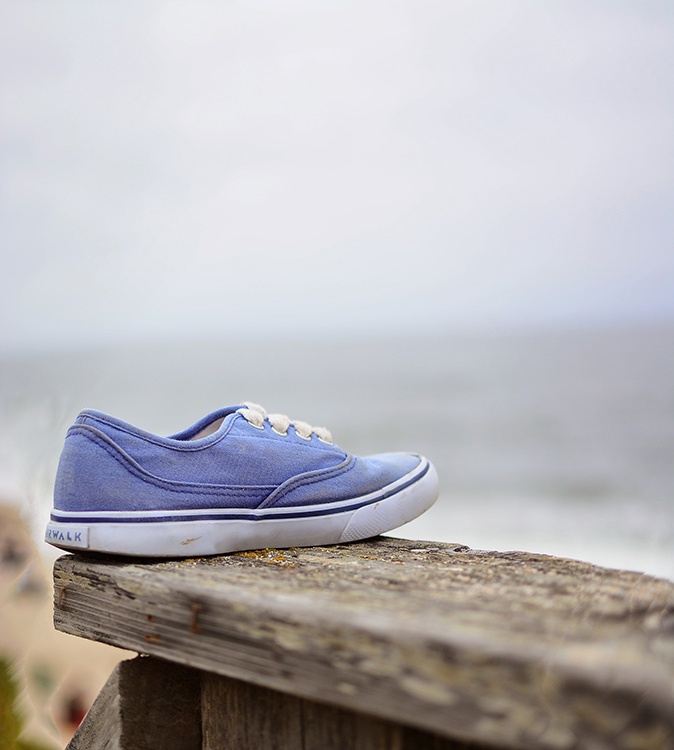
This example looks pretty good. However, there are some artifacts to the left of the shoe in the extreme case.
The subject in this photo is smooth and untextured. Seam carving does a good job as long as the carving is not too extreme.


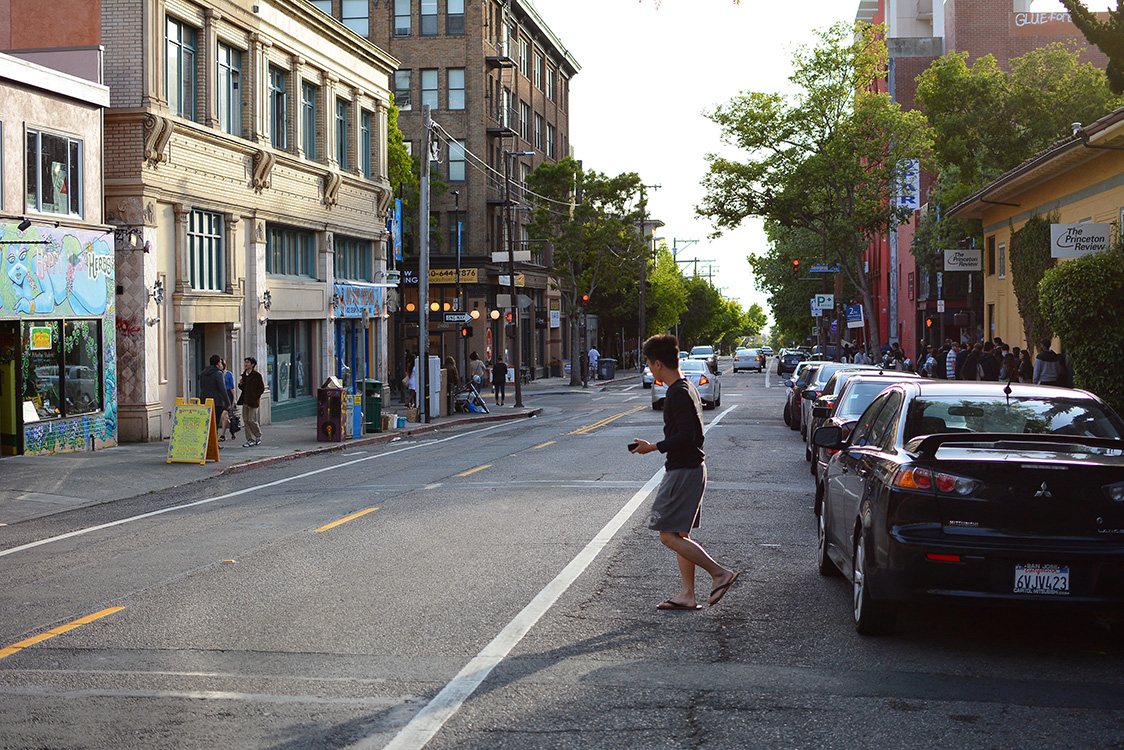
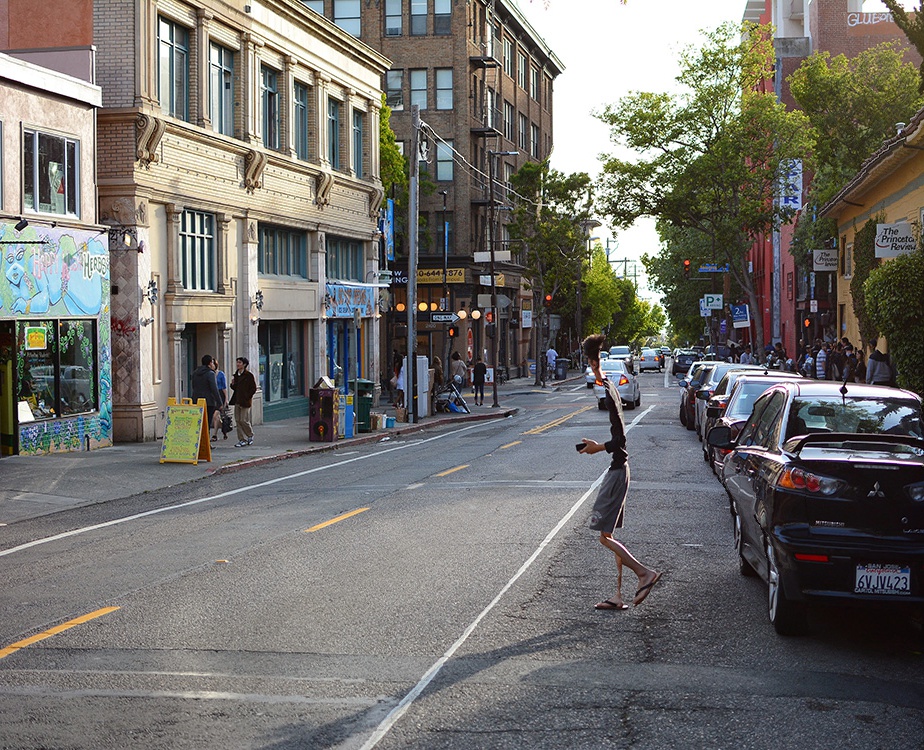
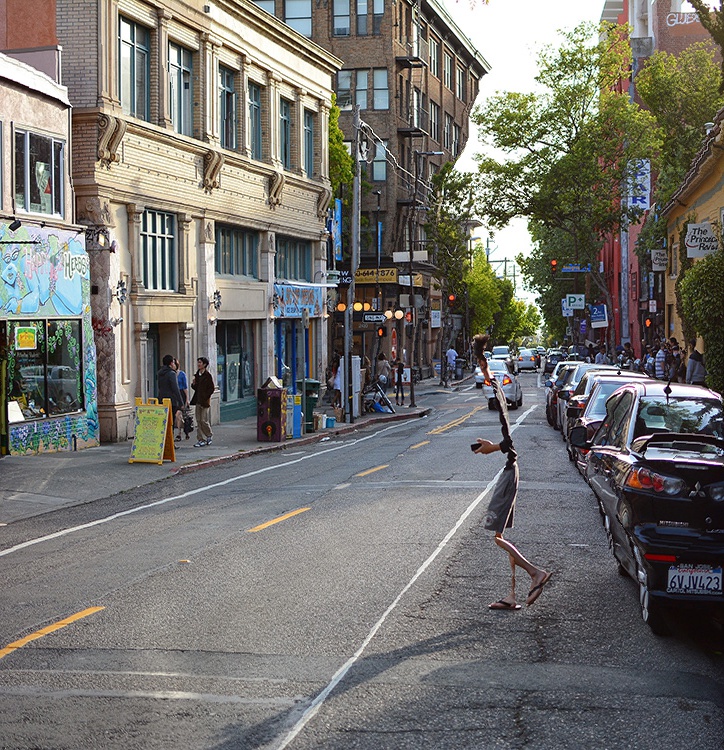
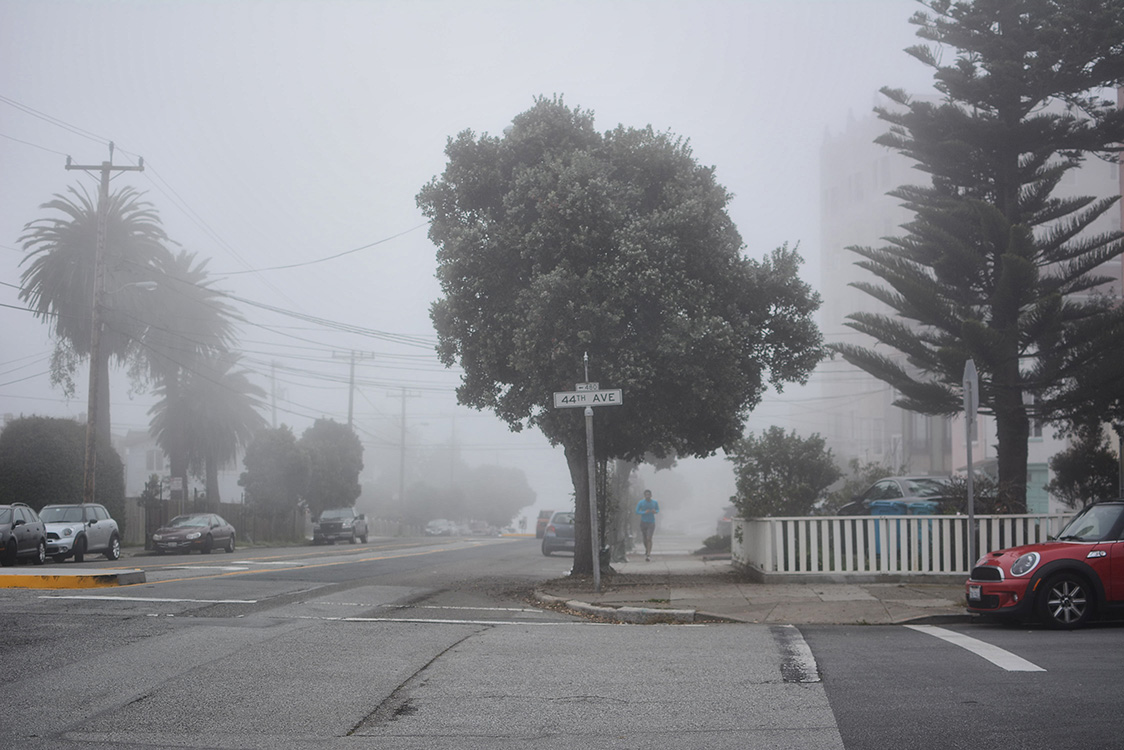
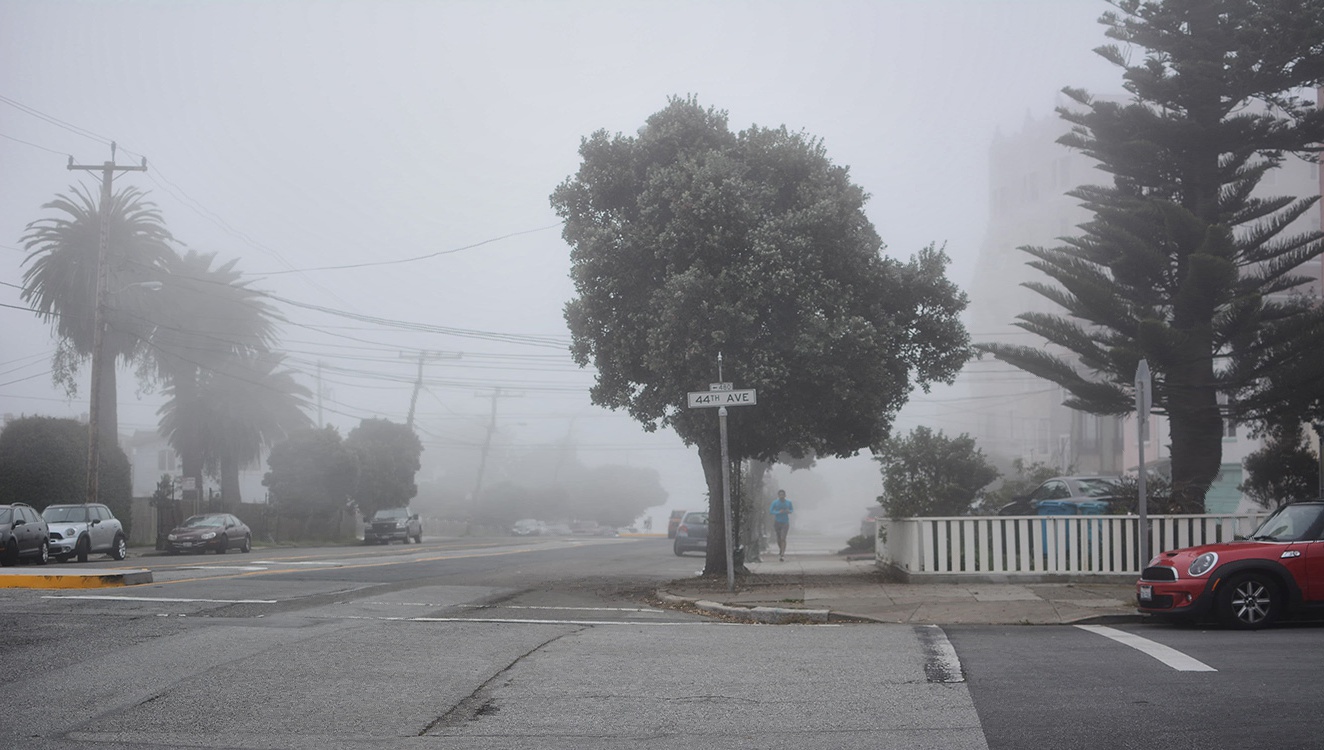
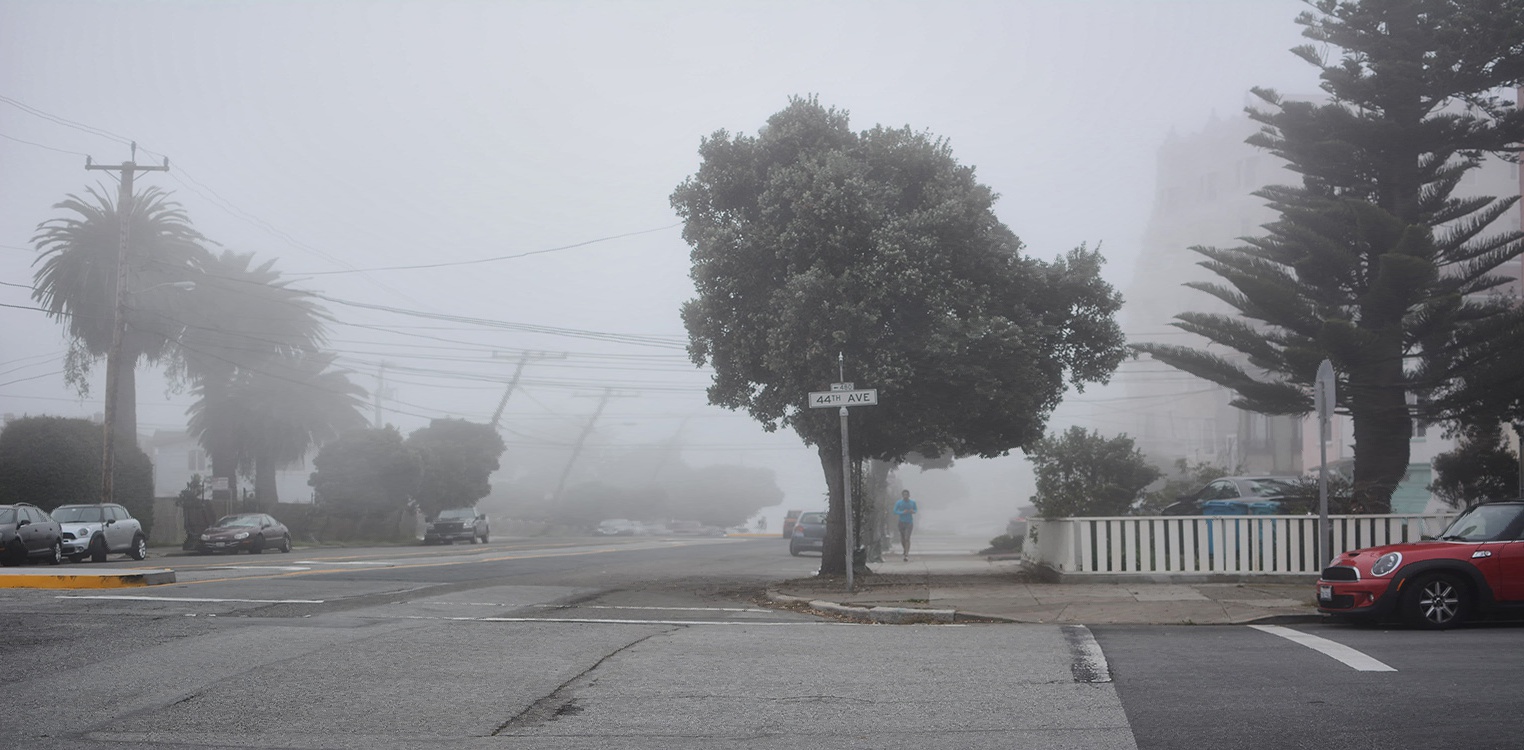
This scene is too busy for the algorithm to do a good job. The person jaywalking in the foreground starts to disappear. This may be because his clothing has less energy than even the surrounding pavement. Ideally, we would like to keep the buildings, trees, and cars, but remove the pavement instead.
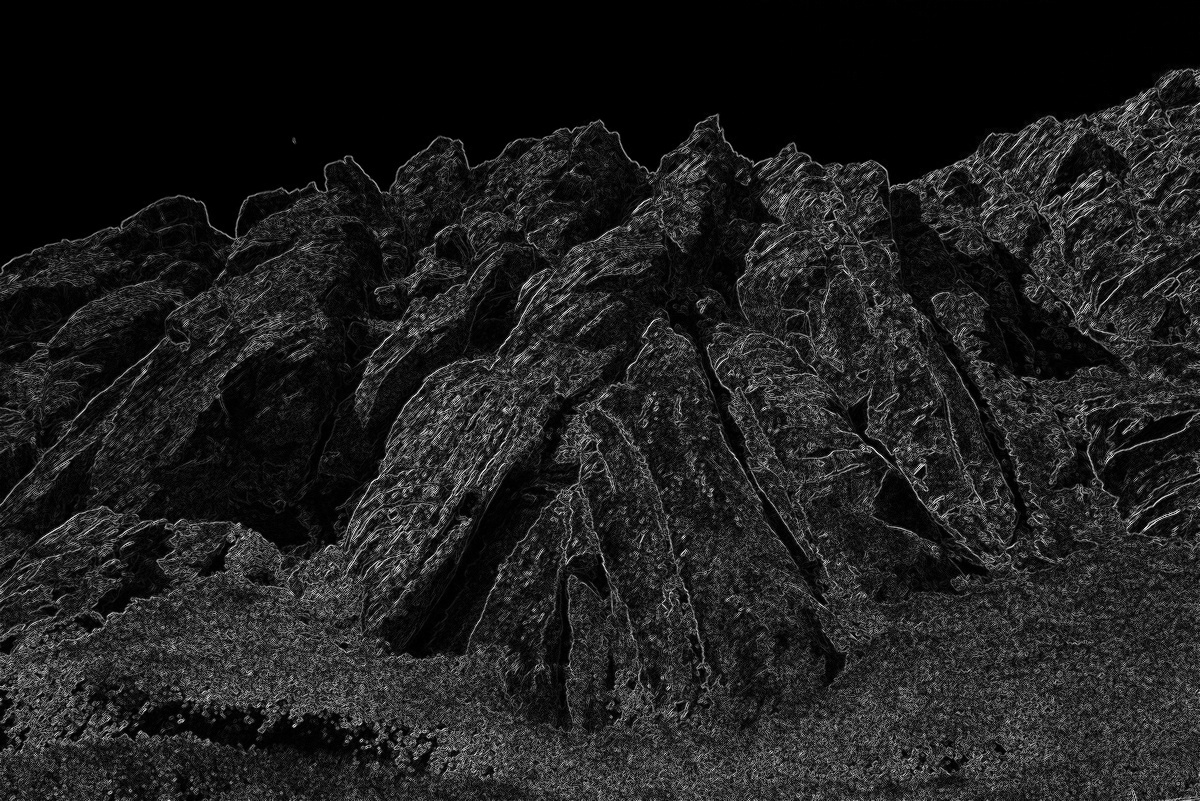
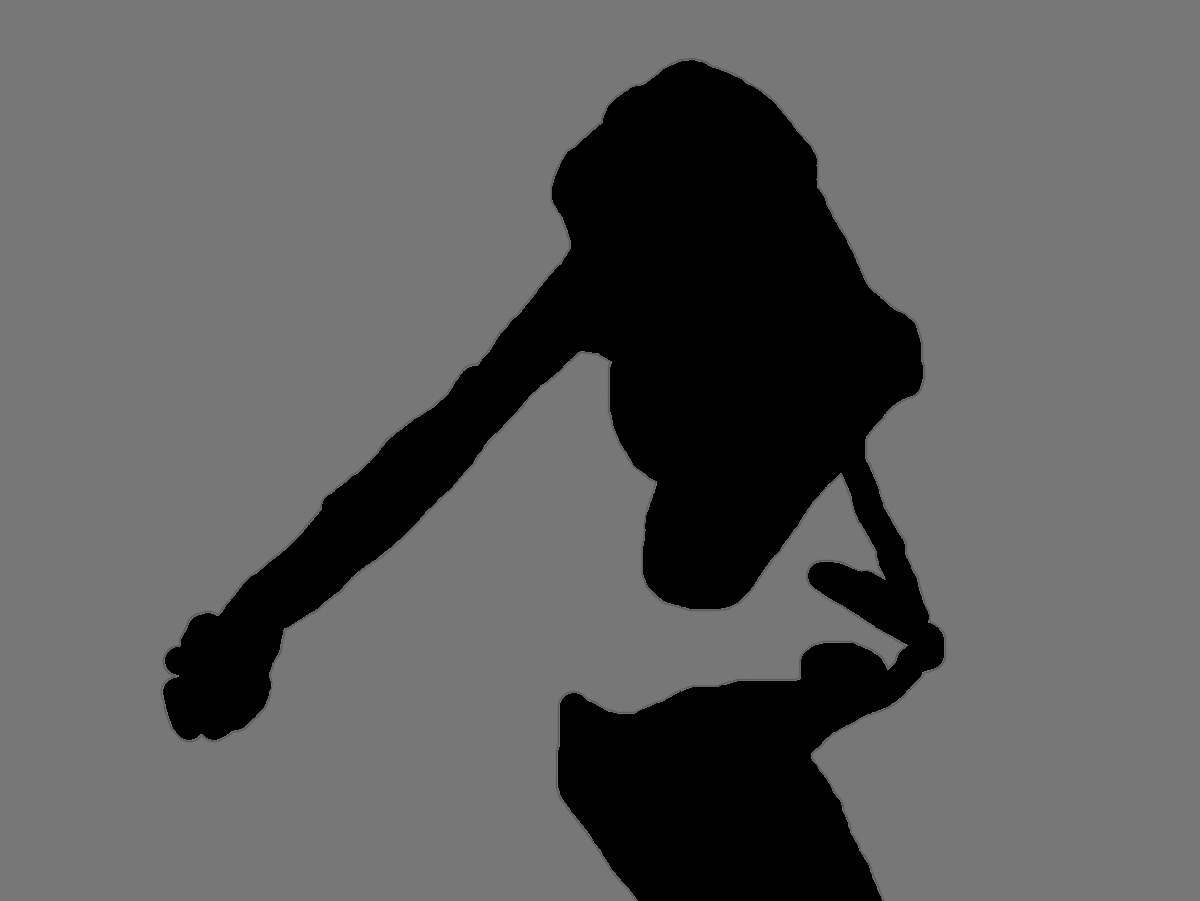
We can confirm our suspicions by taking a look at the computed energy of the original image.
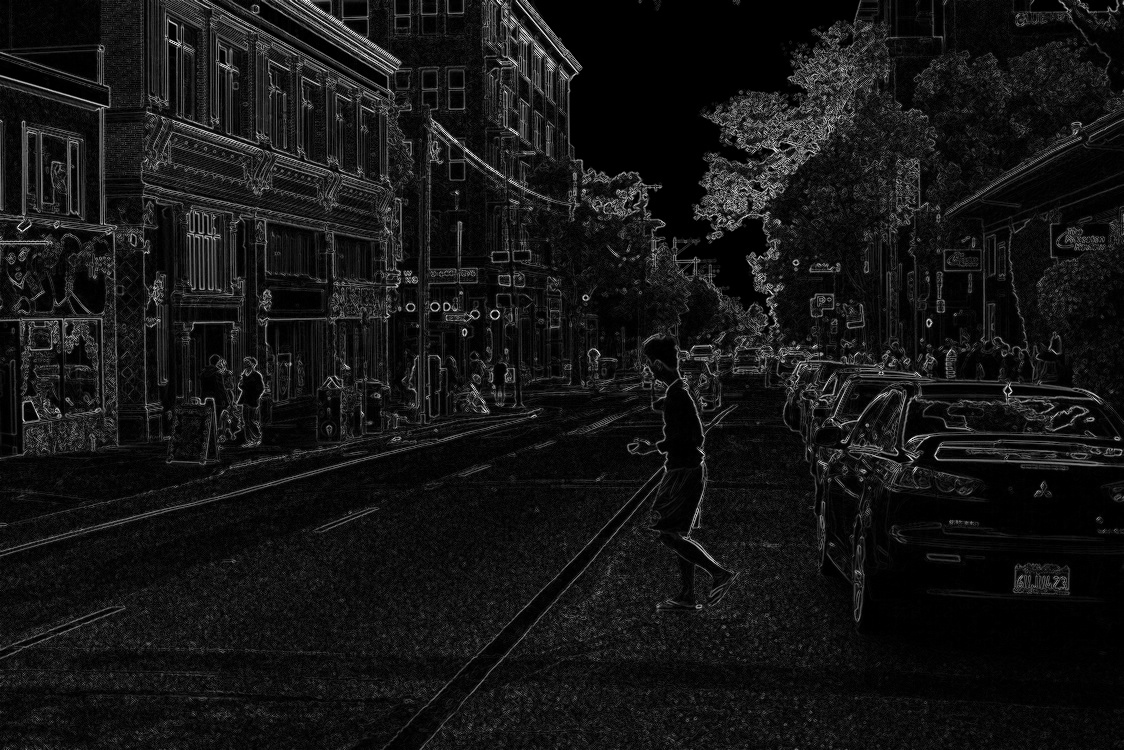
Indeed, the jaywalker’s black sweater is a very dark spot in this visualization of the energy.
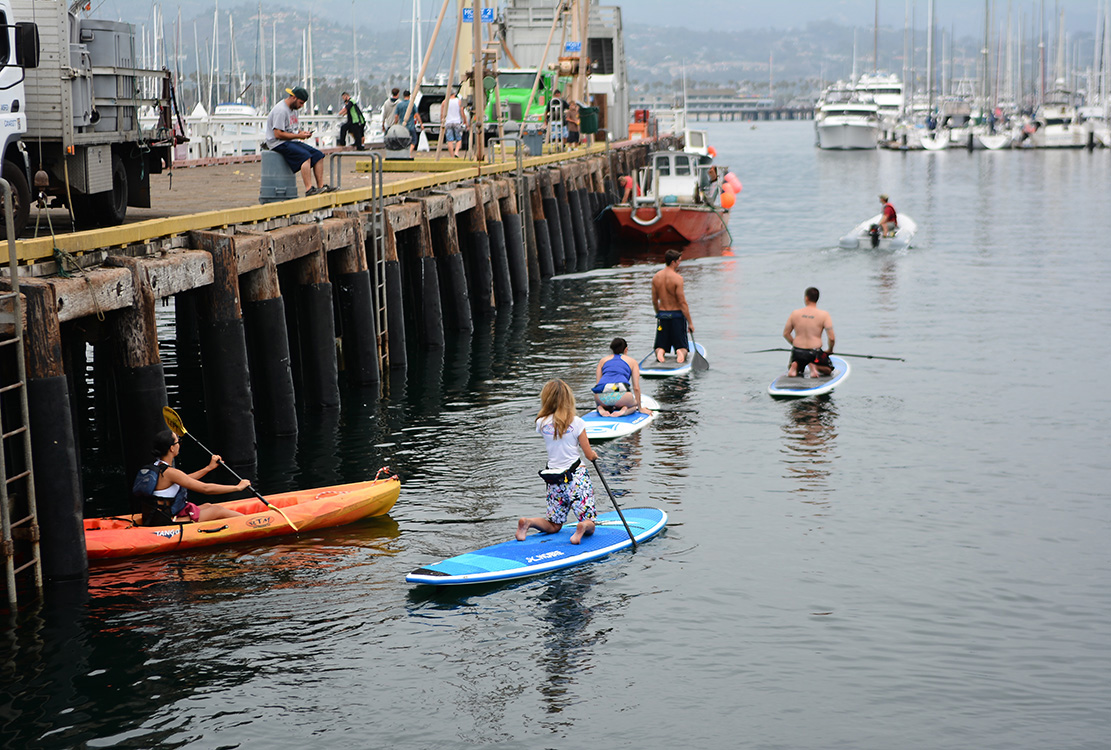
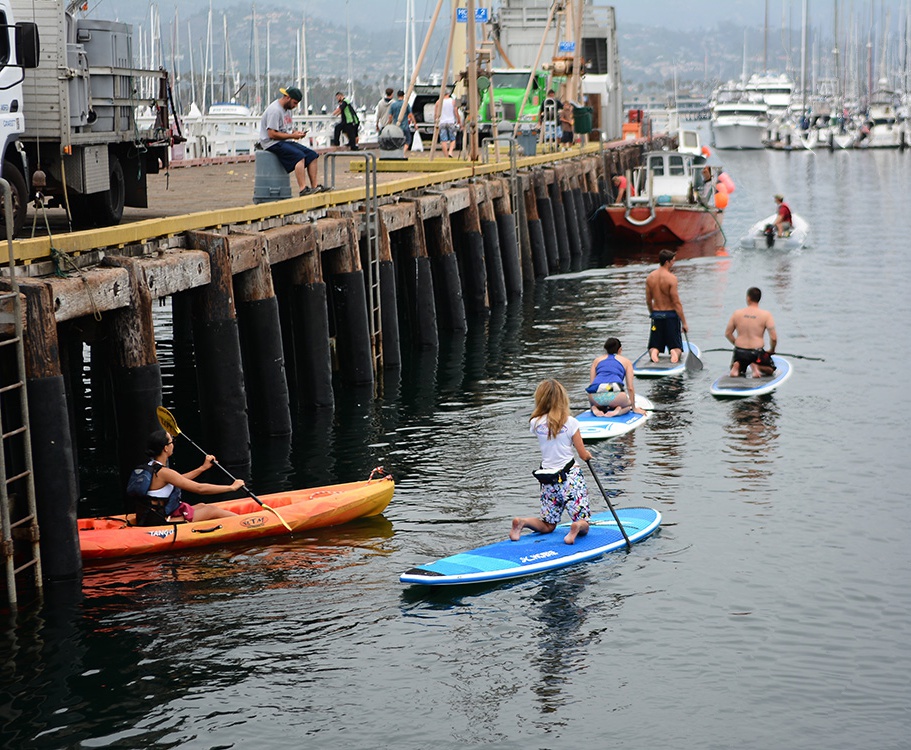
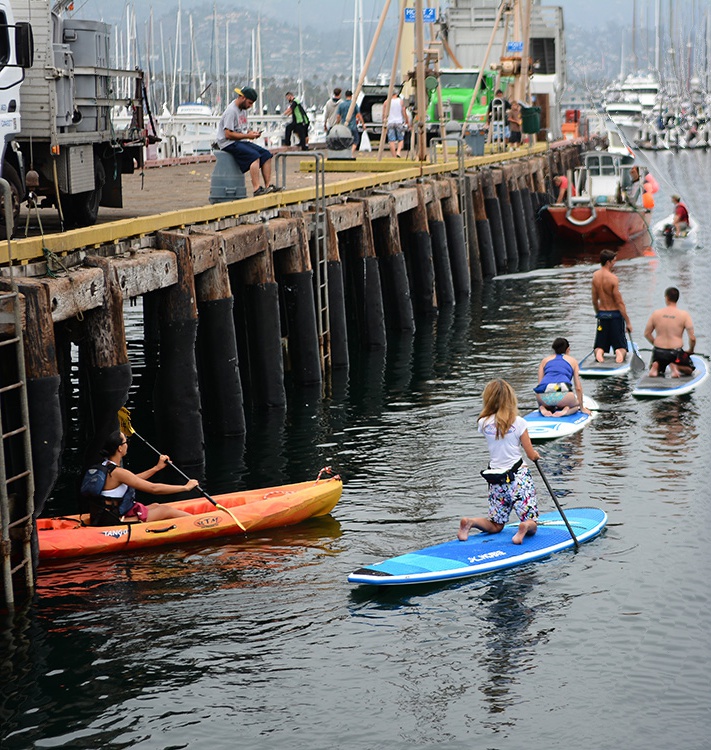
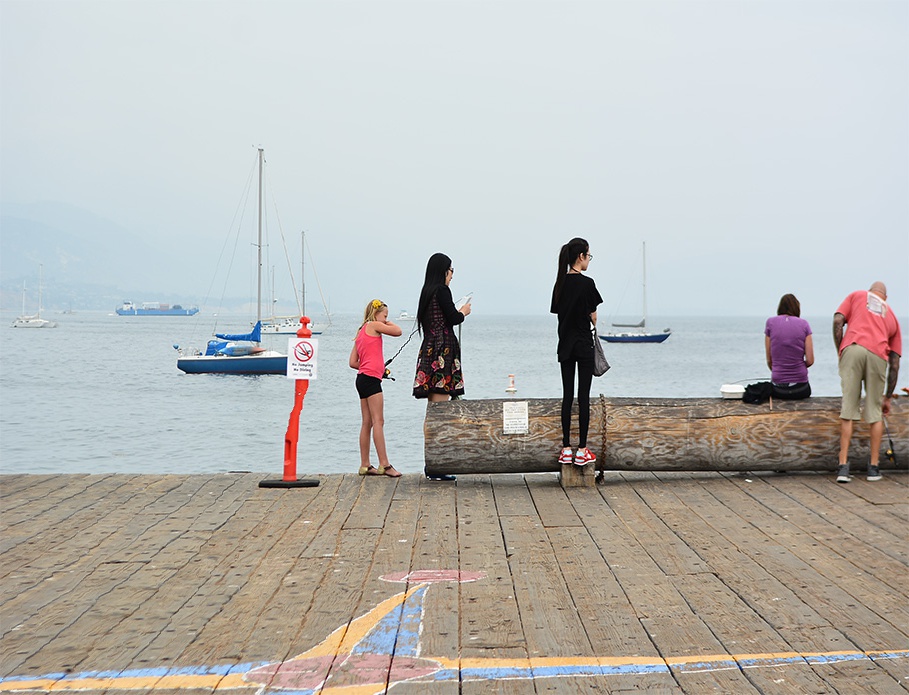
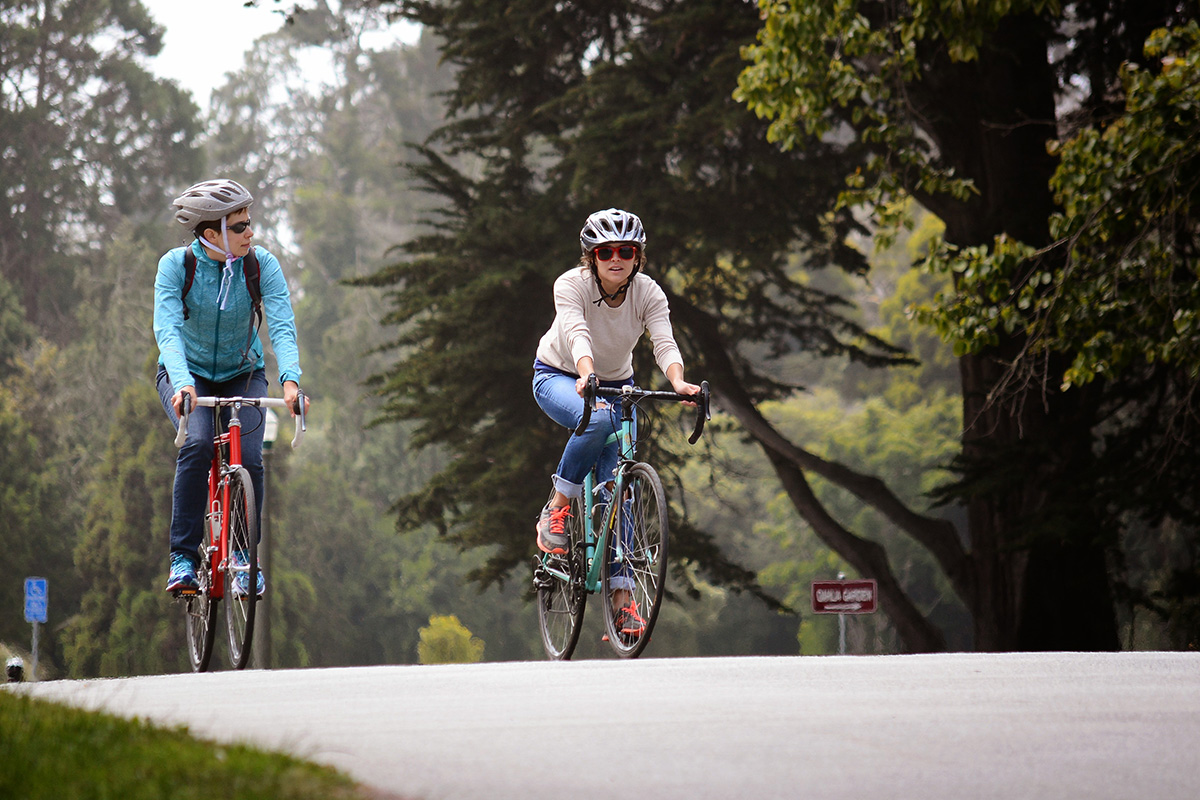
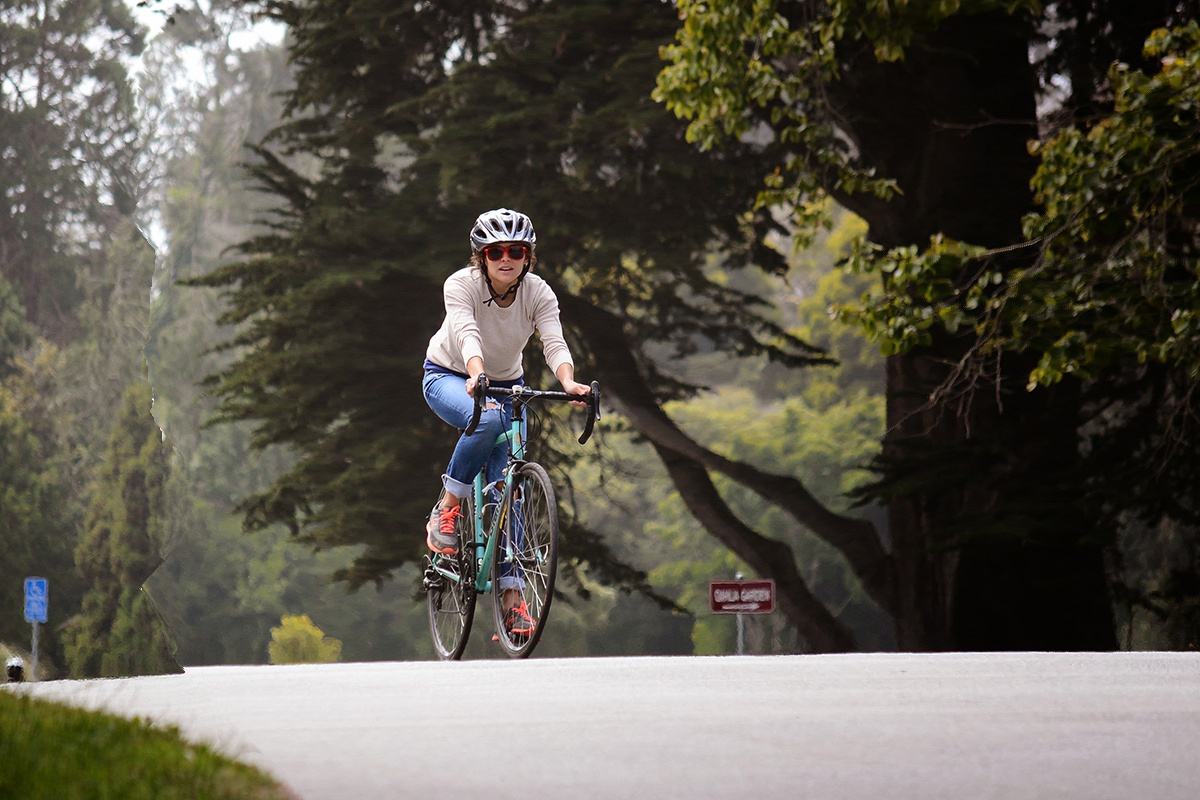
There are a few problems with this image. The orange pole gets distorted in a strange way. Also, the legs of the girl in the middle are attenuated.

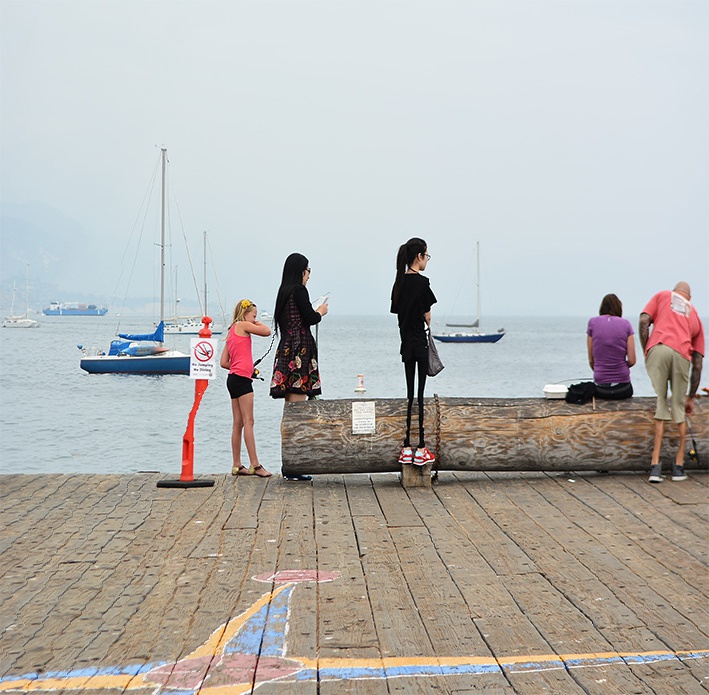
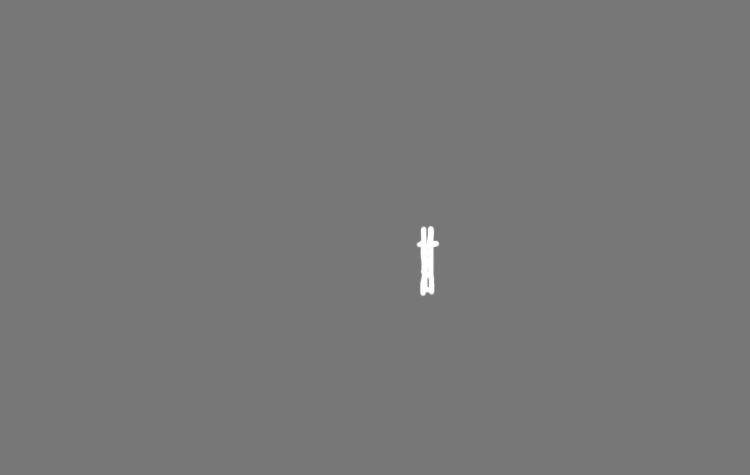
We can explain these problems by taking a look at the energy function.
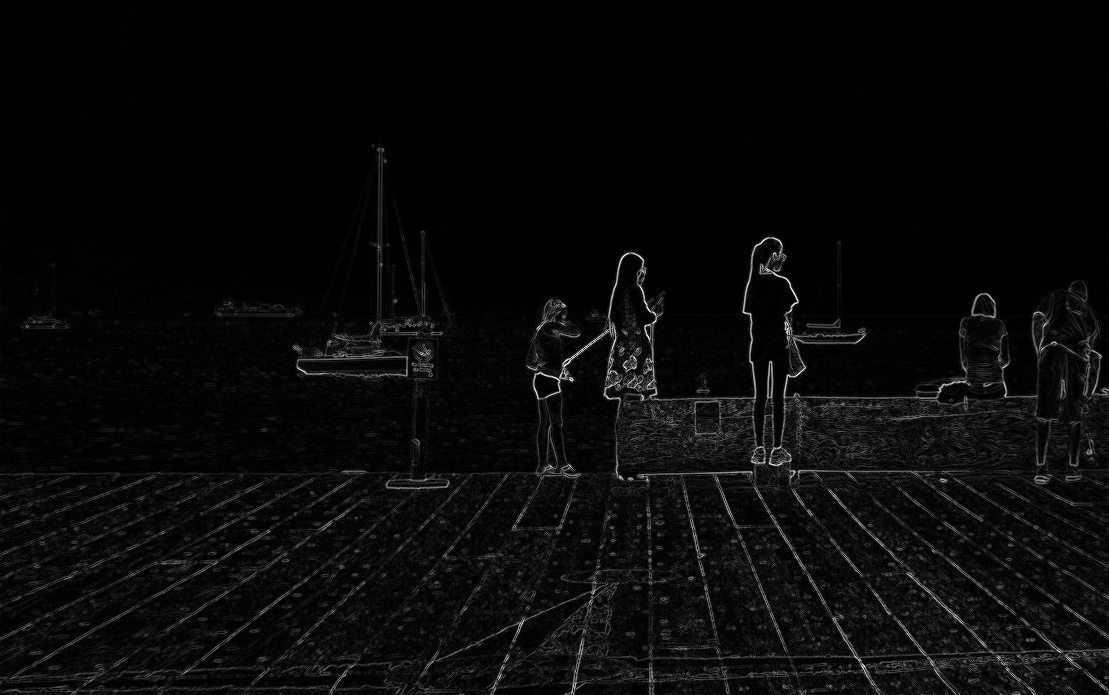
Strangely, the orange pole is almost invisible in this energy function. This is likely because I use the gradient of the value (in HSV representation), and the pole has approximately the same value as the surrounding ocean. An energy function that could take into account the color would be better. The attenuation of the legs is more difficult to fix. One possibility is to let the user override the energy function by protecting certain regions of the image. (See Section 4)
In this image, the shell is squished, even though it is the object of interest.
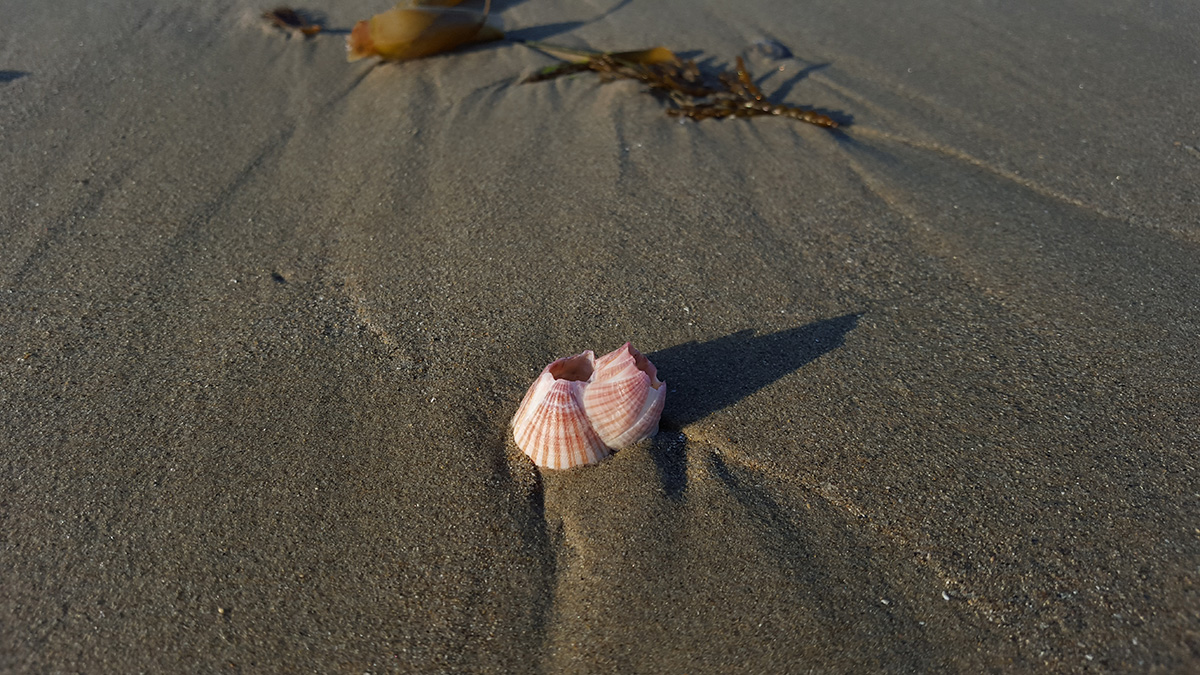
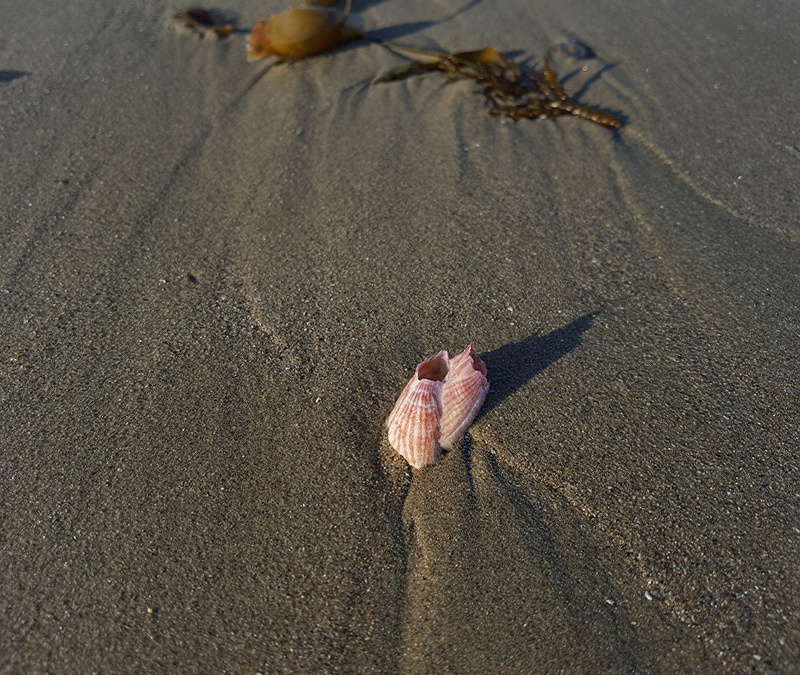
We can explain these problems by taking a look at the energy function.
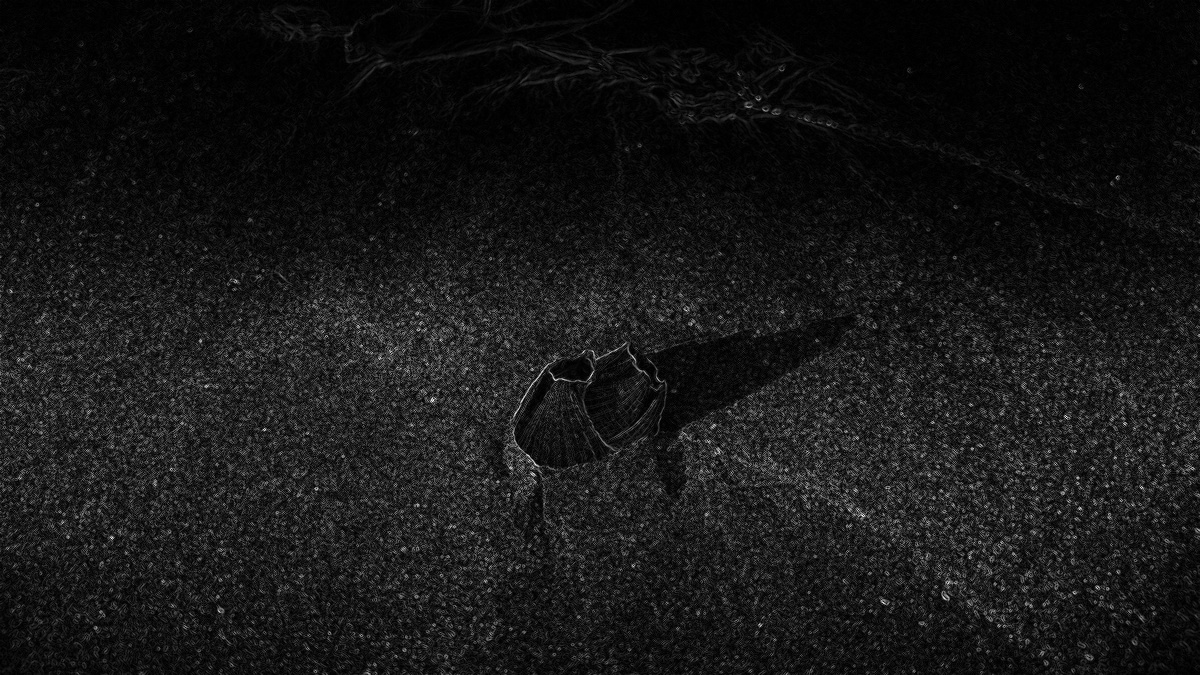
It looks like the shell has even less energy than the surrounding sand. This is probably because the sand is rough while the shell is smoother. One way to fix this is to let the user override the energy function by protecting certain regions of the image. (See Section 4)
The problem with this image is that it is just as good as simply scaling the image. Both the seam carving result and the simple resizing result appear equally plausible.

We can explain these problems by taking a look at the energy function.
The energy is pretty uniform throughout, so there is not a clear place where the algorithm makes a lot of cuts. The end result is an image that is very obviously just squished.
I saved the seam indexes as a JSON object and loaded it into the browser with JavaScript. Then, I used HTML5 canvas to draw the source image. Seams are carved out and re-inserted with operations on the canvas’s image buffer. To improve the performance of this operation, I used a Uint32Array view of the matrix to help the browser optimize the code more easily (idea found here) and I resized the source images to 50% of their original size in each dimension. A HTML5 slider input is inserted above the canvas to allow a user to adjust the width of the image.
The source code for this viewer is available: viewer.js
Instructions: Drag the slider to the left or to the right.
Instructions: Drag the slider to the left or to the right.
Instructions: Drag the slider to the left or to the right.
A related algorithm can be used to stretch images rather than shrinking them. If we insert seams one at a time, the energy function will often make us choose the same seam over and over again. This results in unnatural looking images. Instead, we need the algorithm to insert seams in different places.
The Avidan/Shamir paper suggests a different algorithm. First, the image is shrunk using seam carving. Then, the chosen seams are replayed, but we duplicate them instead of deleting them. This is a 2-phase algorithm, where we first carve and then duplicate.
In order to keep the indexing consistent and correct, I created a new matrix N with
the same dimensions as the input image (but with only 1 color channel), where N[i,j] =
j. In other words, every row looks like is [0, 1, 2, ... W-1]. When I carve a
seam out of the original image, I also carve the same seam out of N. Before carving
each seam, I save both the seam indexes S and the elements of N that
correspond to the seam: [N[0,S[0]], N[1,S[1]], ... ] (call it A). This
is because the elements of S do not account for the seams that have already been
removed.
Additionally, when we insert seams, the pixel indexes change. So, we must account for
previously-inserted seams as well. Essentially, we can express our correct insertion indexes as
the vector 2A-S.
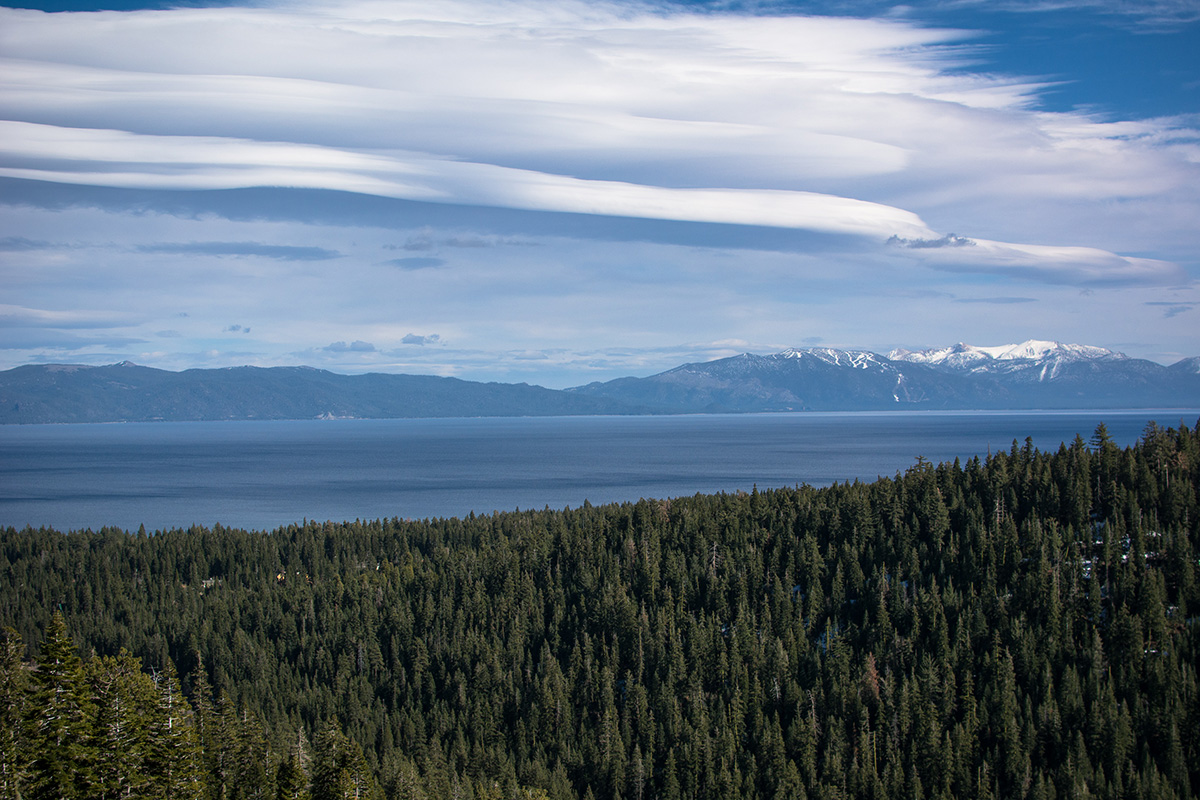
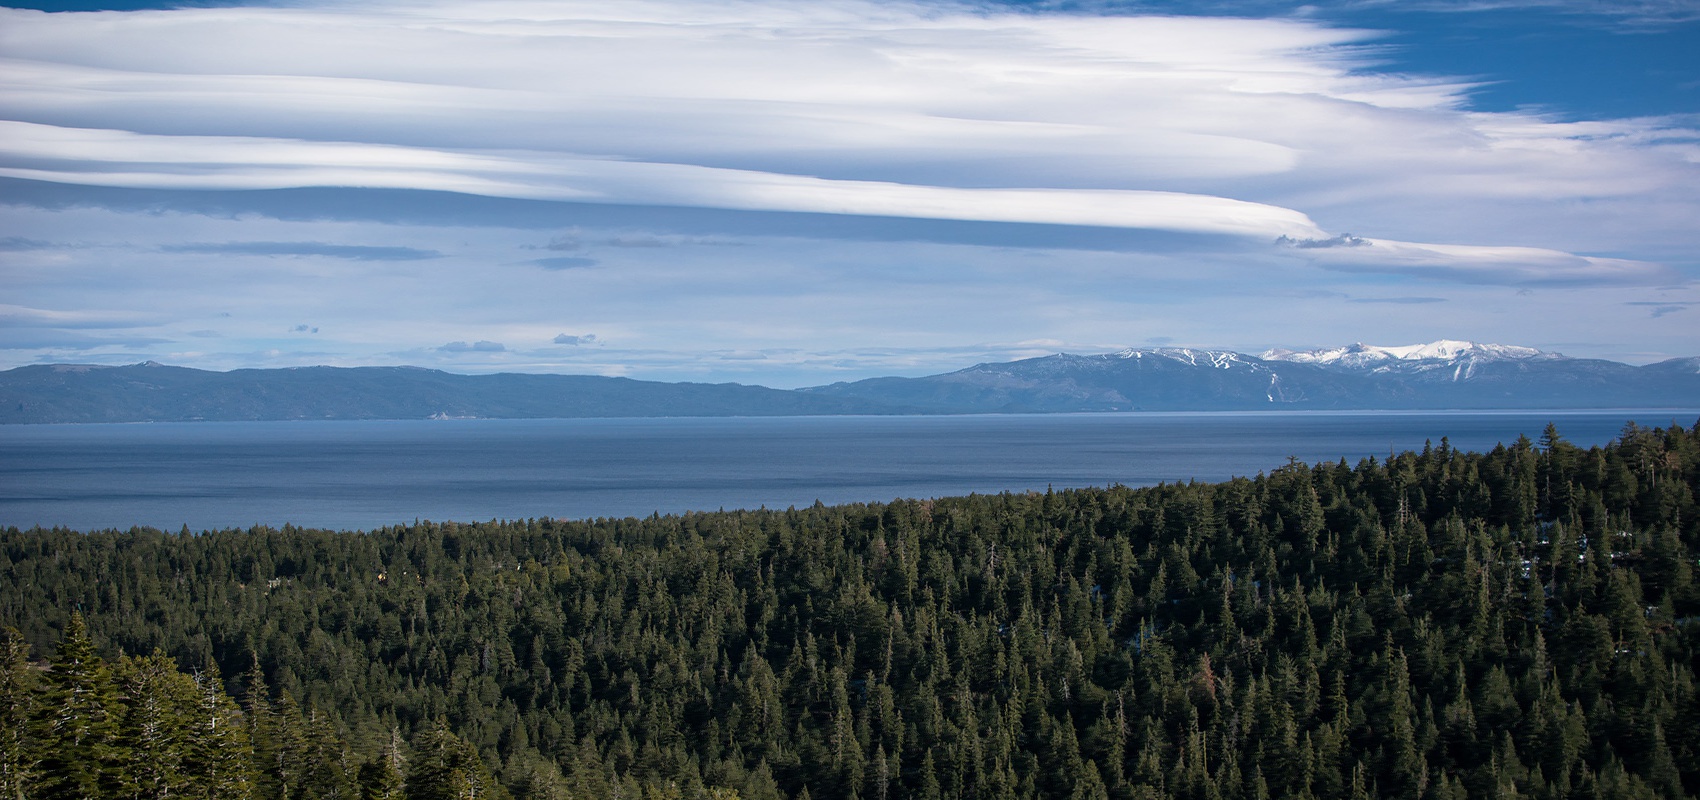
This is a great candidate for seam insertion, because there are a lot of dark places between the trees that can be expanded without noticeable effect. Also, people don’t really know how wide the trees, mountains, or clouds should be. So, even if they are a bit wider, the result still looks plausible.
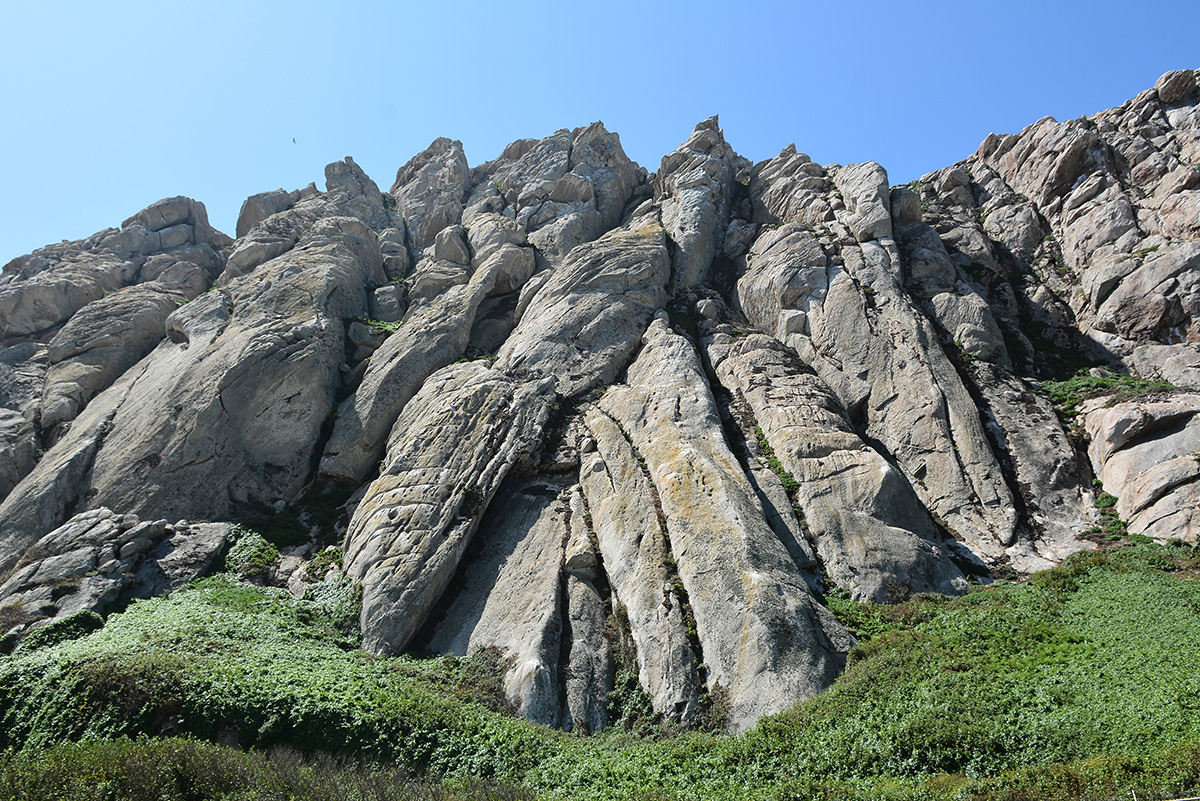
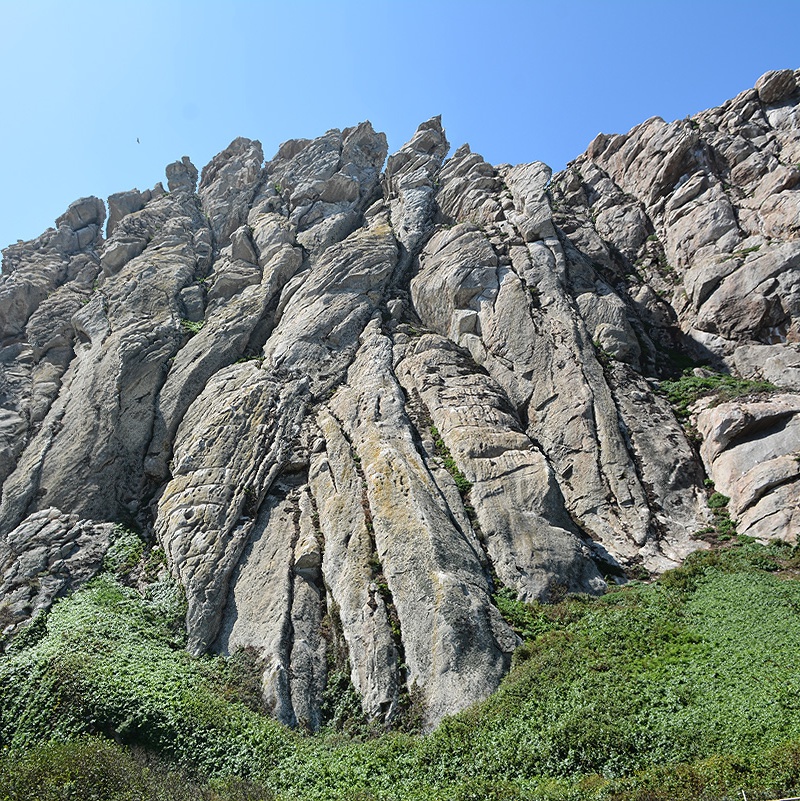
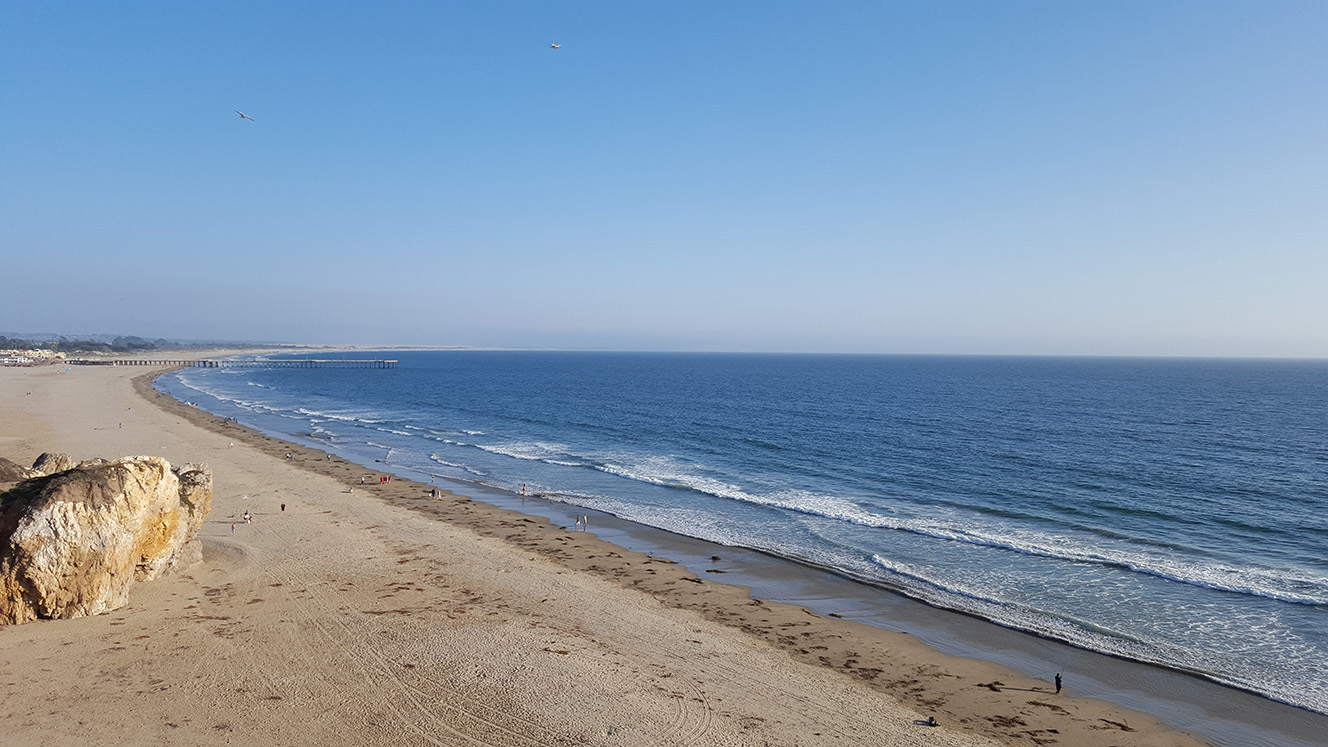
This is another great candidate for the seam insertion algorithm. There is a lot of repeating texture in the waves and the sand. Also, people don't know how wide a rock should be, so even if the rock is stretched out, it still looks plausible.

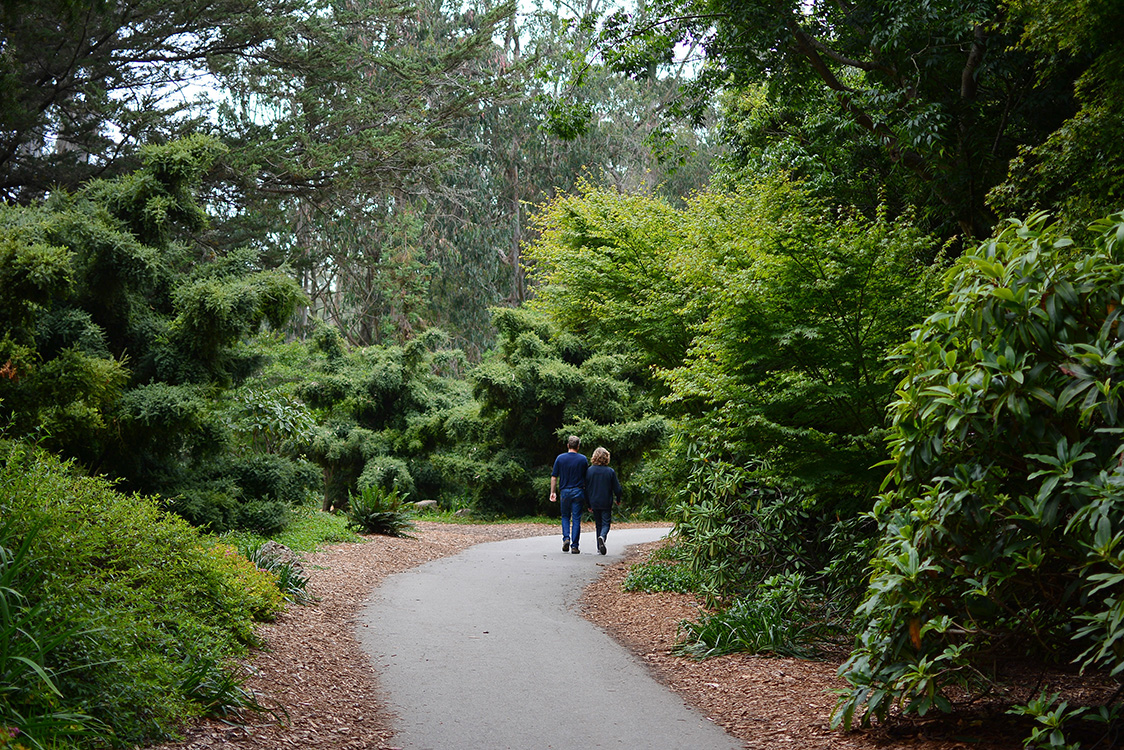
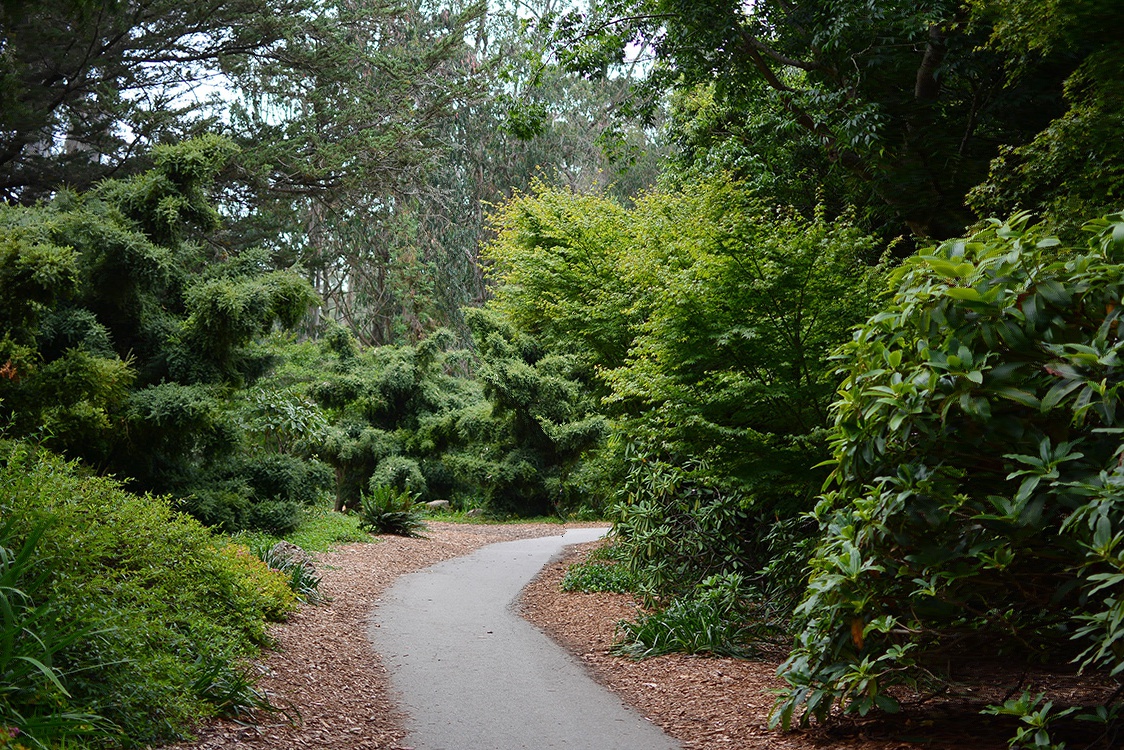
This scene is more complex. At a first impression, it seems like the space between the two sidewalks is the most likely place where seams will be inserted and the image can be stretched.
The results look pretty good. We can definitely see signs of unnatural distortion though. The utility poles and trees in the distance (partially covered with fog) are very slanted. The building behind the right-most tree appears bloated and curved. We can take a look at the energy function to see more details.

When a straight vertical line (like the utility pole) starts to become slanted, we know that the algorithm is inserting seams that cross from the left side of the utility pole to the right side. Based on the energy function, this can most likely be explained by the fact that the tree in the center and the trees on the left create a slanted corridor, which most seams will tend to follow.
I added the ability to override the energy function of an image in order to either protect important parts (faces, people) or target parts for removal (object removal). This section focuses exclusively on the first part (protection), whereas object removal is examined later.
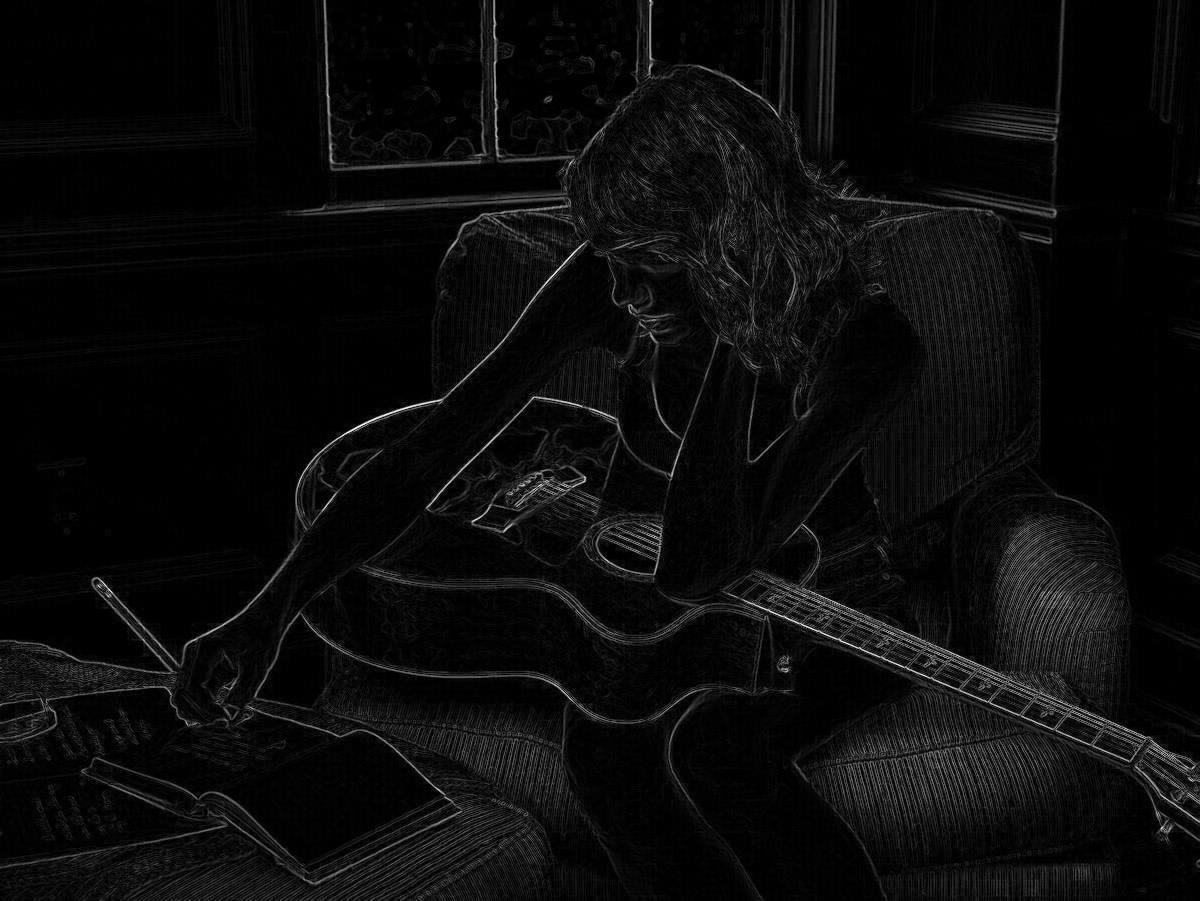
Running the seam insertion algorithm on this image produces strange artifacts on Taylor’s skin. The most noticeable effects are the distortion on her right arm and her legs.


We want to protect the parts of the image that contain Taylor Swift, to make sure that the algorithm only modifies the non-Taylor sections. This is done with a mask, where the black areas will have very high energy applied to them (so they are protected).
Below, you can see the mask, as well as the energy function. The effect of the mask has been dramatically reduced in order to visualize the effects well.
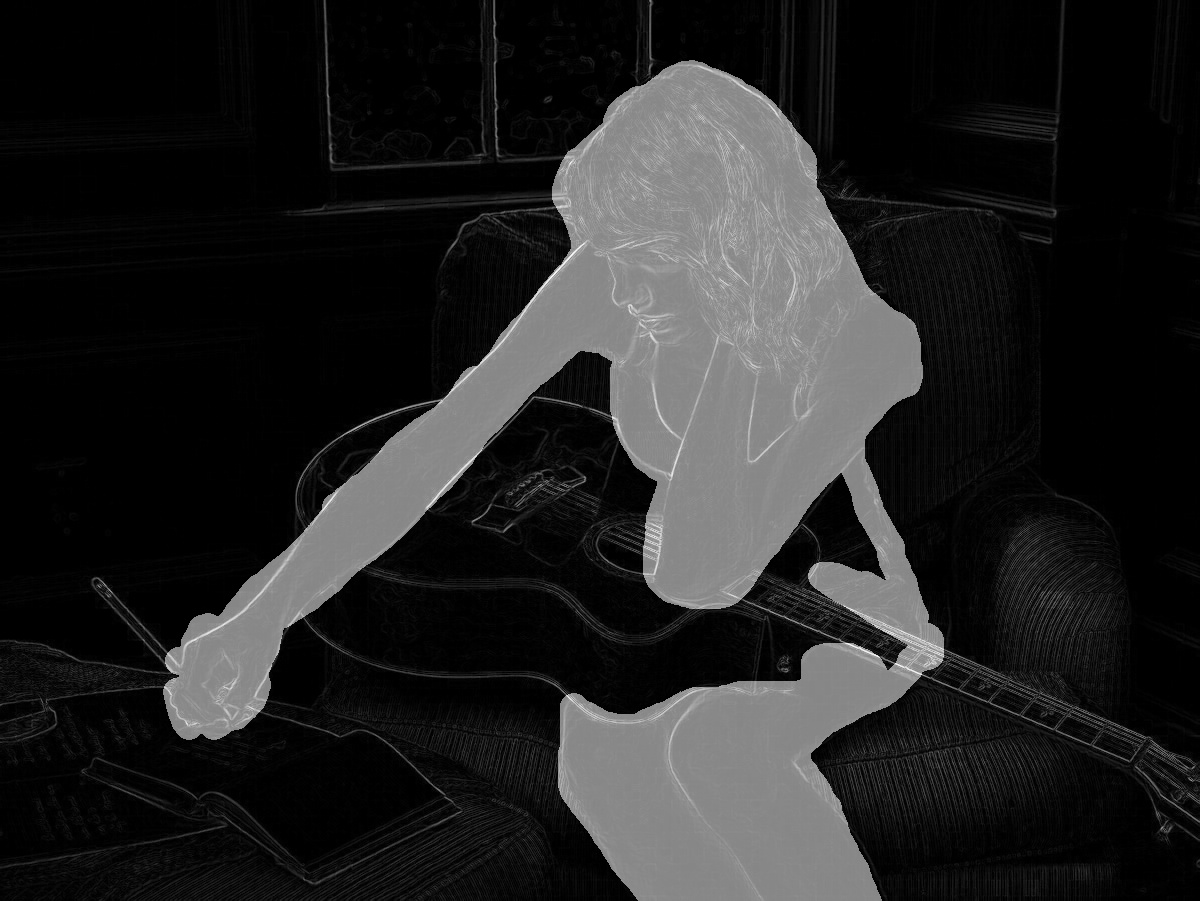
Here are the results with the mask applied:

In the seam insertion result that uses the mask, the appearance of Taylor’s arm and legs are much improved. Parts of the image that are not protected (like the pencil and the neck of the guitar) are distorted even further to compensate.
Here is another example where protecting parts of the image makes a big difference. We are doing seam removal in this example, rather than seam insertion. In this case, the white lace pattern on Taylor’s blouse is a tempting target for the seam removal algorithm.


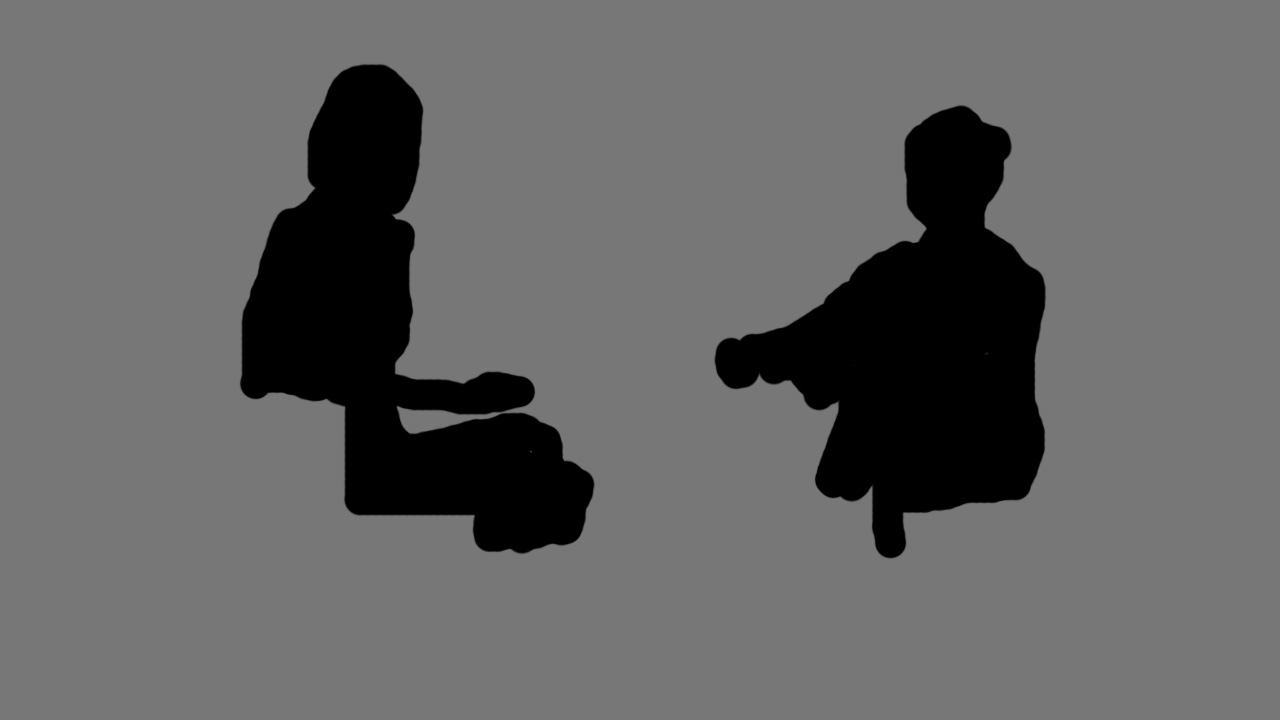
In order to protect the humans in this image, we will apply a mask with black areas (protected areas).
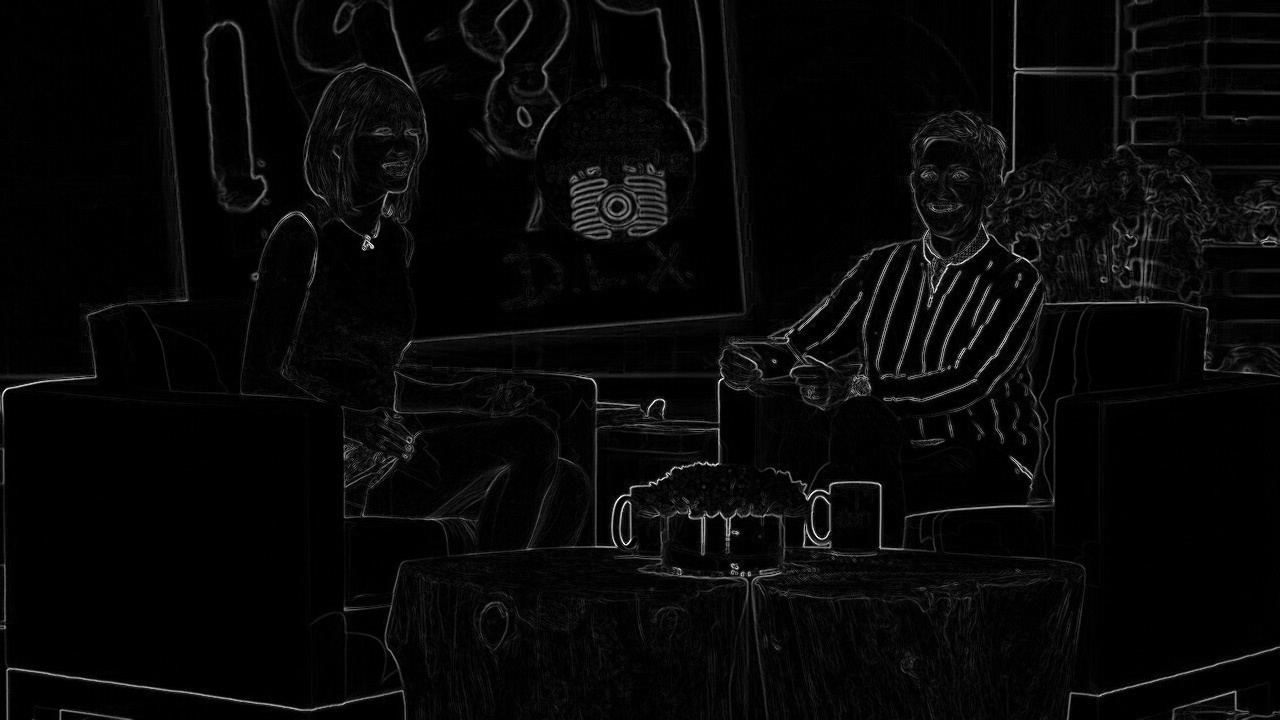
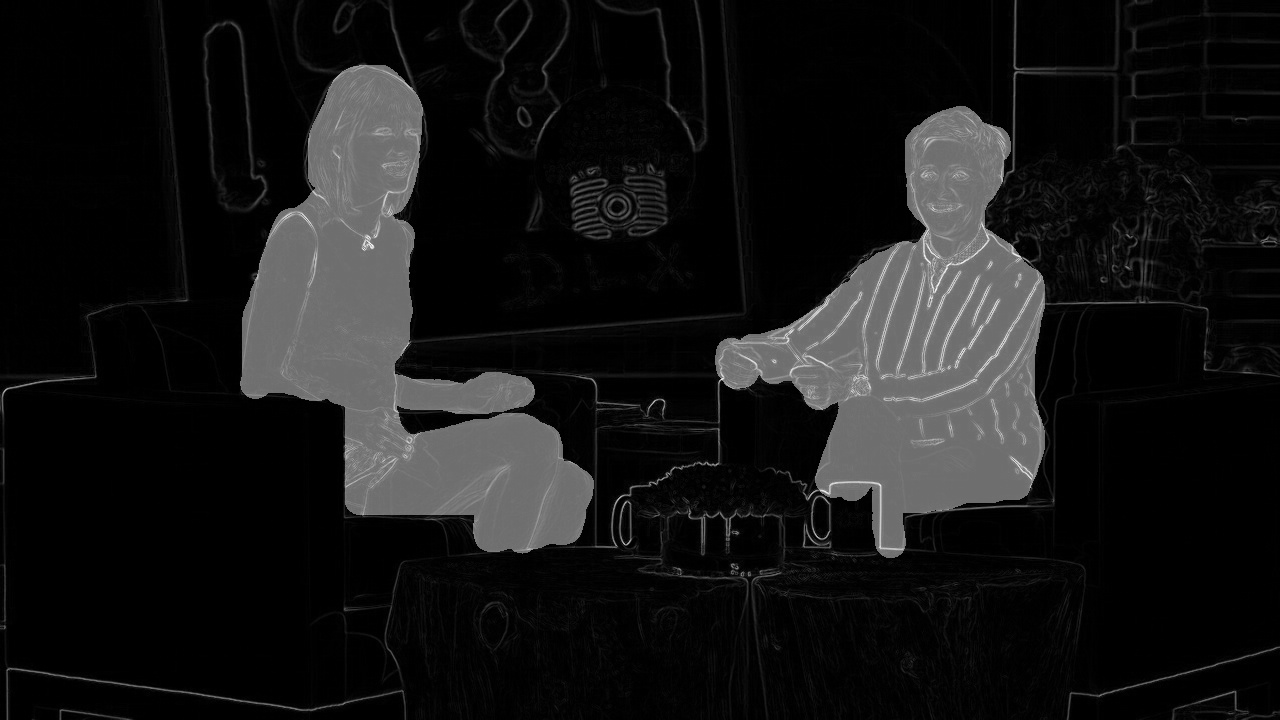
The resulting image is much improved. The distortion in Taylor’s blouse is completely gone. Ellen looks the same in both results, because she didn’t need manual protection anyway (there is a lot of texture in Ellen’s clothing).

The algorithm for object removal is similar to the process of protecting faces. Instead of marking areas to add high positive energy, we mark areas to receive very large negative energy, so they are targeted by the seam removal algorithm to remove first. Then, we insert the same number of seams that we removed, in order to preserve the image dimensions.
The areas marked for deletion are white, instead of black.
This first example turned out just okay. The algorithm will do simple linear interpolation of the existing pixels to fill in the hole, which isn't enough to do a convincing job. There is a visible discontinuity in the image, because the hole we removed is so large and the background on the left and right side are so different.

In this example, the object removal works much better, because the removed area is small and the background does not have sharp edges or steep gradients.


This image was also a pretty good candidate for object removal. The removed area is small, even though the background has a lot of edges and different textures.

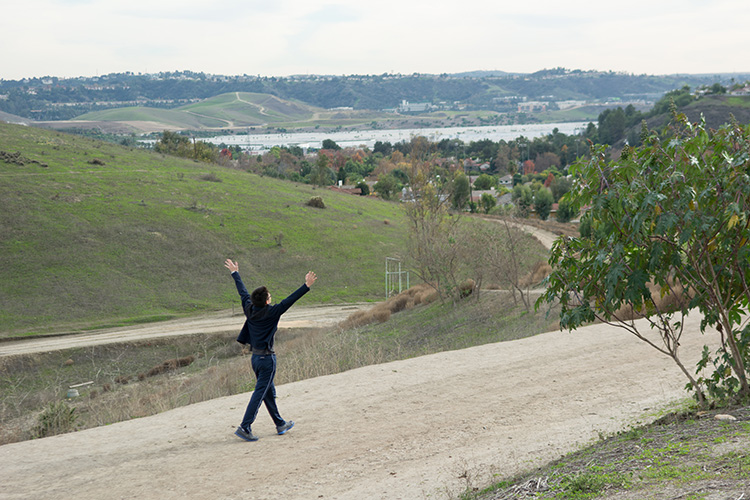
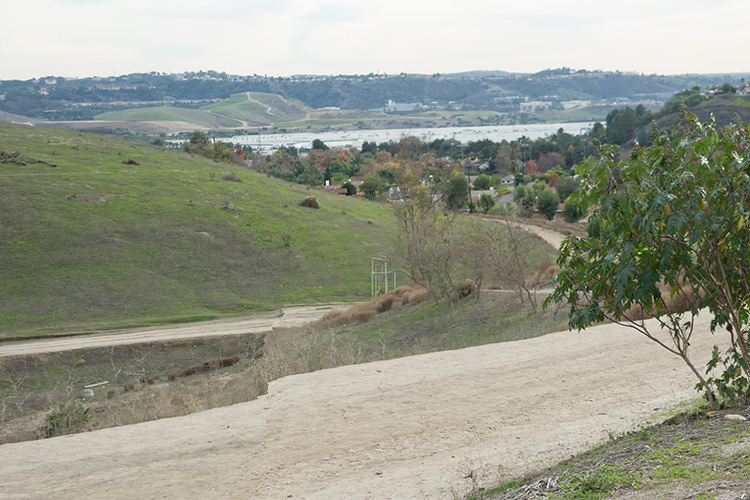
In this image, the man’s outstretched arms cause major issues for the algorithm. Although the actual image area taken up by his body is not large, the outstretched arms make the algorithm do many more iterations to remove every part of the arms.
The result is a clear seam where the object was removed. This seam is especially obvious because the ground is slanted, and the algorithm makes no attempt to correct that discontinuity.

The most important thing I learned during this project was that the results of seam carving really depends on your energy function.